Table of Contents
- Why Bone-In, Skin-On Chicken Thighs Are the Best Choice
- The Air Fryer Advantage: Why It’s Perfect for Chicken Thighs
- Prepping Your Chicken Thighs for Air Fryer Perfection
- Step-by-Step Guide: Air Frying Bone-In, Skin-On Chicken Thighs
- Troubleshooting Common Air Fryer Chicken Thigh Issues
- Flavor Variations and Marinades
- Expert Advice for Air Fryer Chicken Thigh Success
- Serving Suggestions
- Conclusion: Your New Go-To Chicken Recipe
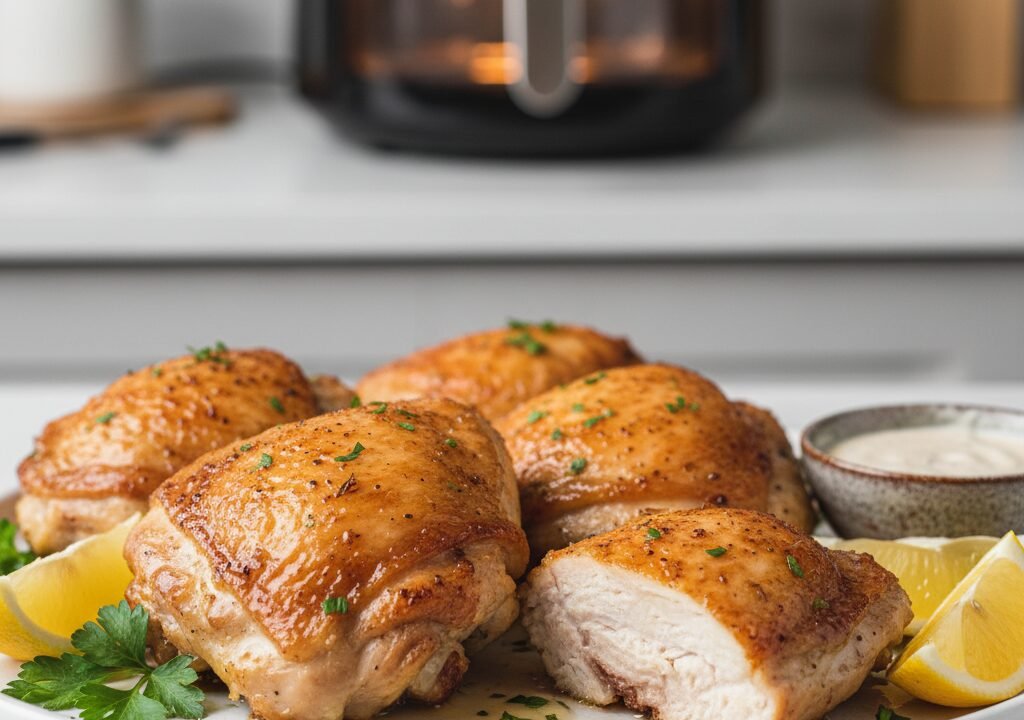
If you’re looking for a fuss-free way to get perfectly cooked, incredibly flavorful chicken on the table, you’ve hit the jackpot. Cooking bone-in, skin-on chicken thighs in your air fryer isn’t just easy; it’s a game-changer. Forget soggy skin or dry meat – this method delivers ultra-crispy skin and wonderfully juicy, tender meat every single time. As a culinary expert who’s tested countless kitchen gadgets and recipes, I can tell you this technique is a staple in my own busy home, and it’s about to become one in yours too.
Why Bone-In, Skin-On Chicken Thighs Are the Best Choice
Before we dive into the “how-to,” let’s talk about why chicken thighs, especially with the bone and skin, are superior for air frying:
- Flavor Powerhouse: The bone adds an incredible depth of flavor that boneless cuts simply can’t match. It acts like a natural flavor enhancer.
- Moisture Keeper: The skin is your built-in basting mechanism. As it renders and crisps, it protects the meat underneath, ensuring it stays incredibly moist and tender. The bone also helps regulate temperature, preventing the meat from drying out.
- Budget-Friendly: Chicken thighs are typically more affordable than breasts, making them a smart choice for delicious, economical meals.
- Forgiving: Thighs have a higher fat content, which means they’re much more forgiving if you accidentally overcook them by a minute or two.
The Air Fryer Advantage: Why It’s Perfect for Chicken Thighs
The air fryer isn’t just a trendy appliance; it’s a workhorse, especially for achieving that coveted crispy texture without deep-frying.
- Unmatched Crispiness: The powerful convection fan circulates hot air rapidly around the chicken, rendering the fat in the skin and creating an unbelievably crispy exterior – almost like deep-fried, but with far less oil.
- Speed and Efficiency: It cooks faster than a traditional oven, preheating quickly and getting dinner on the table in record time.
- Less Mess, Less Oil: You’ll use minimal oil (or sometimes none at all!), and cleanup is usually a breeze thanks to non-stick baskets.
- Even Cooking: The consistent, circulating heat ensures the chicken cooks evenly throughout.
Prepping Your Chicken Thighs for Air Fryer Perfection
Proper preparation is the secret handshake to air fryer success. Don’t skip these steps!
1. Pat Them Dry – Seriously Dry!
This is the most crucial step for crispy skin. Moisture is the enemy of crispiness. Use paper towels to thoroughly pat down every surface of the chicken thighs, especially the skin. Get them as dry as possible.
2. Season Generously
Flavor is king! Here’s a simple, delicious seasoning blend I use regularly:
- 1 teaspoon salt (kosher or sea salt is best)
- ½ teaspoon black pepper
- 1 teaspoon garlic powder
- ½ teaspoon onion powder
- ½ teaspoon smoked paprika (for color and depth)
- Optional: ¼ teaspoon cayenne pepper for a little kick
Rub the seasoning all over the chicken, including underneath the skin if you can gently lift it without tearing. You can also add a very light brush of olive oil before seasoning, but with bone-in, skin-on thighs, the rendering fat is often enough.
3. Score the Skin (Optional, but Recommended)
Using a sharp knife, make a few shallow slits (about ¼-inch deep) across the skin, being careful not to cut into the meat. This helps the fat render out more efficiently, leading to even crispier skin and preventing it from shrinking too much.
Step-by-Step Guide: Air Frying Bone-In, Skin-On Chicken Thighs
Let’s get cooking! This method is designed to give you that perfect balance of crispy skin and juicy meat.
1. Preheat Your Air Fryer
Always preheat your air fryer for at least 5 minutes. This ensures the basket is hot when the chicken goes in, helping to immediately crisp the skin and prevent sticking. Set it to 375°F (190°C).
2. Arrange in the Basket
Place the seasoned chicken thighs in a single layer in your air fryer basket, skin-side up. Do not overcrowd the basket. Air needs to circulate around each piece for even cooking and maximum crispiness. If you have a smaller air fryer or a lot of chicken, cook in batches.
3. Initial Cook: High Heat for Crispy Skin
Cook the chicken thighs at 375°F (190°C) for 15-20 minutes. At the 10-minute mark, you can peek to ensure the skin isn’t browning too quickly. If it is, you might reduce the temperature slightly for the remainder of this phase.
4. Flip and Finish: Lower Heat for Even Cooking
After 15-20 minutes, carefully flip the chicken thighs over (skin-side down). Continue cooking at 375°F (190°C) for another 10-15 minutes. This helps cook the meat evenly and ensures the underside gets some direct heat.
5. Final Crisp (If Needed)
Flip the chicken back to skin-side up for the last 5-10 minutes of cooking. This is your final crisping stage. Keep an eye on it to prevent burning.
6. Check for Doneness
The most important step! Use an instant-read meat thermometer inserted into the thickest part of the thigh, avoiding the bone. The internal temperature should read 175°F (80°C). While poultry is safe at 165°F (74°C), chicken thighs truly shine when cooked to a slightly higher temperature, as the connective tissues break down further, making them incredibly tender without drying out.
- Total cooking time typically ranges from 30-45 minutes, depending on the size of your thighs and your specific air fryer model.
7. Rest Your Chicken
Once cooked, transfer the chicken thighs to a cutting board and let them rest for at least 5-10 minutes. This allows the juices to redistribute throughout the meat, resulting in a much juicier bite. Don’t skip this!
Troubleshooting Common Air Fryer Chicken Thigh Issues
Even with the best instructions, sometimes things go awry. Here’s how to fix them:
- Soggy Skin:
- Did you pat the chicken dry enough? This is usually the culprit.
- Was the basket overcrowded? Cook in batches.
- Was your air fryer preheated?
- Dry Meat:
- Overcooked. Always use a meat thermometer!
- Didn’t rest the chicken.
- Uneven Cooking:
- Basket was overcrowded.
- Didn’t flip the chicken halfway through.
- Some air fryers have hot spots; try rotating the pieces.
- Smoking Air Fryer:
- Too much fat rendering. Place a slice of bread underneath the basket to absorb drips, or add a little water to the drawer below the basket (if your model allows).
- Dirty air fryer. Clean it regularly, especially after fatty foods.
Flavor Variations and Marinades
Once you’ve mastered the basic technique, feel free to get creative with your flavors!
Dry Rubs:
- Herby Garlic: Add dried rosemary, thyme, and oregano to your basic seasoning.
- Spicy Southwest: Incorporate chili powder, cumin, and a pinch more cayenne.
- Lemon Pepper: Use a good quality lemon pepper seasoning blend.
Marinades (with a caveat):
While marinades add flavor, they also add moisture, which can hinder crispy skin. If you use a marinade:
- Marinate for at least 30 minutes, up to 4 hours.
- Crucially, pat the chicken extremely dry after marinating before seasoning and air frying.
- Flavor Ideas: Teriyaki, lemon-herb, balsamic, or a simple buttermilk brine for extra tenderness.
Expert Advice for Air Fryer Chicken Thigh Success
From my kitchen to yours, here are a few insider tips:
- Invest in a Good Thermometer: Seriously, it’s the single best tool for perfectly cooked meat. No more guessing!
- Don’t Be Afraid of High Heat: The initial higher temperature is key for jumpstarting that crispy skin.
- Clean as You Go: Wipe down your air fryer basket after each use. Rendered fat can build up and cause smoking.
- Size Matters: Larger thighs will take longer to cook. Adjust your times accordingly.
- Experiment: Every air fryer is a little different. The first time you make these, pay close attention to your specific model’s performance and adjust timing for future cooks.
Serving Suggestions
These crispy, juicy chicken thighs are incredibly versatile. Here are some ideas:
- Classic Comfort: Serve with mashed potatoes and roasted green beans or asparagus (which you can also air fry!).
- Light & Fresh: Pair with a big garden salad or a vibrant quinoa salad.
- Global Flavors: Serve alongside rice and steamed broccoli, or with a side of couscous and a dollop of tzatziki.
- Sandwich/Wrap Star: Shred leftover chicken for delicious sandwiches, wraps, or tacos.
Conclusion: Your New Go-To Chicken Recipe
There you have it – everything you need to know to master air fryer bone-in, skin-on chicken thighs. This method is a true game-changer for busy weeknights, delivering restaurant-quality results with minimal effort. The combination of crispy, flavorful skin and succulent, juicy meat is simply irresistible. So go ahead, grab some chicken thighs, fire up your air fryer, and prepare to impress yourself and your family. Once you try it, you’ll wonder how you ever lived without this incredible technique!
You May Like
Crispy, Juicy Air Fryer Bone-In, Skin-On Chicken Thighs
🥗 Ingredients Checklist
Tap checkboxes as you prep🔥 Step-by-Step Cooking Instructions
Follow in precise sequenceSurface Prep: Pat chicken breasts thoroughly dry with paper towels to eliminate exterior moisture. Slice thick ends horizontally for uniform thickness.
Spice Emulsion: Whisk avocado oil, smoked paprika, garlic powder, onion powder, oregano, salt, and pepper in a small prep bowl. Rub evenly over all sides of the chicken.
Preheat Cycle: Set your air fryer to 380°F (193°C) and preheat for 3 minutes to stabilize internal chamber convection.
Aerodynamic Placement: Place chicken breasts in a single layer in the crisper basket with at least 1/2-inch spacing. Do not overlap.
The Mid-Point Flip: Air fry for 6 minutes, then use silicone tongs to flip the breasts. Continue cooking for another 6 minutes.
Thermal Verification & Rest: Probe the thickest center with an instant-read thermometer. Remove once internal temp reaches 165°F. Rest 5 minutes on a cutting board before slicing.